
.avif)
AC Installation in Schoolcraft, MI
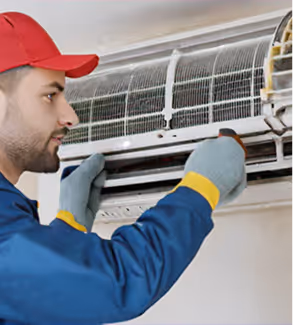
Installing a new air conditioning system is a major decision for Schoolcraft, MI homeowners. With humid summers, variable temperatures, and older housing stock in parts of the area, the right installation improves comfort, indoor air quality, and long-term energy costs. This page explains the complete AC installation process tailored to Schoolcraft homes: load assessment and sizing, system comparisons, ductwork evaluation, permitting and code compliance, installation timeline and testing, warranty and maintenance options, financing and rebate considerations, and a practical pre-installation checklist.
Why a professional AC installation matters in Schoolcraft, MI
Schoolcraft experiences warm, humid summers that place heavy demands on cooling systems. Undersized equipment struggles to remove humidity, leading to sticky indoor air and higher energy use. Oversized systems short-cycle, increasing wear and reducing dehumidification. Proper installation ensures the AC matches your home’s specific needs, improves year-round efficiency, and prevents common comfort problems that are especially noticeable during Michigan’s hottest months.
Common AC installation needs and issues in Schoolcraft, MI
- Replacing aging central split systems that no longer meet efficiency expectations
- Switching from window or portable units to whole-house central or ductless systems
- Upgrading to high-efficiency systems to reduce energy bills and improve humidity control
- Homes with inadequate or leaky ductwork that undermine system performance
- Properties without existing ductwork considering ductless mini-split installations
- Compliance updates for homes with older electrical panels or insufficient circuit capacity
Home load assessment and accurate unit sizing
A professional installation begins with a detailed load assessment (Manual J). This examines:
- Home size, layout, insulation levels, and window types
- Orientation and solar gain specific to your property in Schoolcraft
- Number of occupants and typical internal heat gains from appliances
- Existing ductwork efficiency and room-by-room comfort needs
From this assessment the installer selects the right capacity and efficiency level. Emphasize correct sizing rather than the largest unit: the goal is balanced cooling and dehumidification matched to your home.
Comparing system types and high-efficiency options
Understand the pros and cons of common systems so you choose what fits your home and budget:
- Central split systems: Most common for homes with existing ducts. Offer whole-house comfort and good dehumidification when sized correctly. High-SEER models and variable-speed compressors improve efficiency and comfort.
- Ductless mini-splits: Ideal for homes without ducts, additions, or zone-specific control. Provide efficient cooling and avoid the cost of installing new ductwork.
- Heat pump systems: Modern heat pumps provide both heating and cooling efficiently, performing well even in Michigan climates with cold winters when properly specified.
- Packaged units: Used when space constraints or rooftop installations are preferred.
High-efficiency features to consider:
- Variable-speed compressors for more consistent temperatures and better humidity control
- Two-stage compressors to reduce cycling and improve comfort
- ENERGY STAR-rated equipment for lower operating costs and greater eligibility for incentives
Ductwork evaluation and required modifications
Ductwork performance directly affects system efficiency and comfort. A thorough evaluation includes:
- Leakage testing and sealing recommendations
- Insulation levels for ducts in unconditioned spaces
- Proper sizing of supply and return runs to match the new equipment
- Balancing issues and recommendations for adding returns or improving airflow
Common duct modifications in Schoolcraft homes include sealing joints, insulating ducts in attics or crawlspaces, and resizing undersized returns to reduce pressure imbalances.
Permitting and code compliance
Installations must comply with Michigan and local building codes and typically require permits. A professional installer will:
- Submit permit paperwork to the appropriate local building department or Kalamazoo County office
- Ensure electrical work meets code, including correct circuit capacity and disconnects
- Follow refrigerant handling and venting regulations
- Provide inspections and final documentation required for occupancy and warranty validation
Installation timeline and testing procedures
Typical residential AC installations follow these stages:
- Pre-installation walkthrough and load results review
- Delivery of equipment and any custom ductwork or electrical upgrades
- Day-of installation: mounting condenser, connecting refrigerant lines, setting indoor coil or air handler, and integrating controls
- System charging and start-up testing
Testing procedures performed at completion:
- Refrigerant charge verification and airflow measurements
- Electrical safety checks and thermostat calibration
- Temperature split and humidity performance checks
- Combustion and venting tests if integrating with fossil-fuel heating equipment
- Final balancing and homeowner orientation on operation and controls
Most straight swaps are completed in a day; complex ductwork or electrical upgrades may extend the timeline.
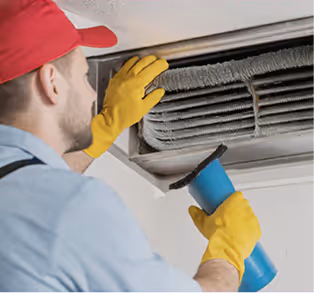
Warranty and maintenance plan options
Understand the difference between manufacturer warranties and service agreements:
- Manufacturer warranties typically cover the compressor and major components for a set period; proper installation and registration are often required to maintain coverage
- Installer workmanship warranties cover labor and installation defects for a specified term
- Ongoing maintenance plans provide annual inspections, coil cleaning, filter checks, refrigerant-level verification, and priority service
Regular maintenance preserves efficiency, lengthens equipment life, and keeps manufacturer warranties valid. In Schoolcraft’s humid environment, seasonal tune-ups are especially important to maintain dehumidification performance.
Financing, rebates, and incentives
Many homeowners offset installation costs through:
- Utility rebates for high-efficiency equipment, often offered by regional electric providers
- State and federal incentives or tax credits for qualifying energy-efficient systems and heat pumps
- Financing options through lenders or manufacturer programs that spread payments over time
A professional installer can help identify likely incentives and ensure installed equipment meets the eligibility requirements for rebates and tax incentives.
Pre-installation checklist for Schoolcraft homeowners
- Gather recent energy bills and note areas of comfort concern (hot rooms, humidity)
- Verify access to installation areas (attic, crawlspace, outdoor condenser location)
- Ensure sufficient electrical service and clearances for outdoor unit placement
- Plan for pets or children during day-of installation activities
- Review load assessment and equipment proposal to confirm capacity and efficiency choices
Closing — long-term benefits and maintenance advice
A correctly specified and professionally installed AC system delivers reliable comfort, better humidity control, and lower operating costs—benefits especially meaningful in Schoolcraft’s humid summers. Prioritize accurate load calculations, ductwork integrity, and equipment efficiency when evaluating options. After installation, schedule annual maintenance and keep documentation for warranty and incentive compliance. Taking these steps will maximize comfort, protect your investment, and ensure the system performs as expected for years to come.
Customer Testimonials

In the past 18 months, Adams has installed a new Amana air conditioning system, and new filtration and humidification systems at my home. The installers were all very courteous, professional and knowledgeable. Their work was simply superb... reasonably priced, and performed on time and to perfection! I enthusiastically recommend Adams, without reservation!
As usual, Adams Heating and Cooling exceeded our expectations. The quote was done in a timely manner, pricing was fair, installation was quick and the job was done right! Rob is great to work with. Adams is first on our list!
Called these guys off of a referral from a friend. Home furnace failure in sub-zero temperatures, late at night. Dan was there in an hour. Friendly, polite, professional and most importantly, very competent. Diagnosed and fixed the problem in under an hour. After hours 24/7 pricing was surprisingly reasonable. This outfit gets straight A+ from us.
Excellent service! We had them replace our heater, AC, and water heater as a package deal. They even helped with financing as it was a large expense to address at one time. It left us with peace of mind that all the mechanicals in our home were new!
They have always been there for us and did so again by responding quickly to put in a new furnace after a lighting strike caused a power surge. In addition, their electrician came by to help with other issues caused by the strike. Everyone we work with from the who answers the phone to who shows up to complete the work are polite, pleasant and professional! And quick to respond and on time!
From the service call to the installation with Dan, Dave, and Daniel… our experience was top notch. They quickly came out, identified the problem, and installation of our new unit took less than 3 hours. Can’t recommend Adams enough!
Dan, Dave and Mike were phenomenal! Very patient, listened to my questions/concerns, and made sure that everything was working and that my Nest was working correctly, before leaving. Thank you so much for your service!
Service was excellent! Had a new furnace installed. The technicians did a wonderful job and completed the installation quickly. Mike answered my questions and followed up to verify the worke done. I was charged just as I was quoted. Have used Adam's for repairs in the past and I'm always pleased. Great work!
I had a boiler and water heater replacement/upgrade. I went from an 84% efficient boiler to a 95% efficient. I dont recall the water heater's efficiency. That was upgraded to an indirect water heater. Josh and Brad did a great job. The work looks great. The boiler and water heater work as to be expected. Their customer service is excellent. I will definitely be calling then when my basement remodel is ready to start.
I have had Adam's Heating and Cooling out at my house before, so I called them for some gas line work. The estimator was very helpful and let me know the best way to be ready for when the work is scheduled so they can test the generator after they install the gas line to the meter and also let me know how to take care of another issue I had that would be helpful. I look forward to getting this work done and working with them.

Financing
Flexible financing options are available to help you get the comfort you need without the upfront financial stress.