
Furnace Pilot Light Troubleshooting: Diagnose and Fix Common Pilot Light Problems

The pilot light is the small, always-on flame that ignites your furnace or water heater’s main burner. A steady pilot is key to dependable heat and hot water. This guide walks you through what pilot lights do, why they fail, and how to troubleshoot common issues safely. You’ll get symptom-based diagnosis, step-by-step relighting instructions, guidance on testing and replacing a thermocouple, water-heater specific tips, and a simple maintenance checklist to reduce repeat problems. Safety is our top priority — we’ll help you spot gas smells, understand carbon monoxide risks, and know when to stop and call a pro. The article moves from causes and quick checks to relighting steps, thermocouple decisions, water heater troubleshooting, maintenance tasks, and when to contact a technician. Where appropriate, we point you to quick-reference tables and clear next steps to either fix the issue yourself or schedule service through the company’s website or Google Business Profile.
Why Does the Furnace Pilot Light Keep Going Out?
The pilot goes out when something interrupts combustion, fuel flow, or the safety sensor that keeps the gas valve open. Common causes are drafts, a clogged pilot orifice, a failing thermocouple, or problems with the gas valve or supply. Each cause creates recognizable symptoms that make diagnosis faster. Understanding these root problems helps you decide whether to relight, clean, replace a part, or call for professional service. Below we list the usual causes and explain how a bad thermocouple in particular leads to repeated shutoffs.
What Are the Common Causes of a Pilot Light That Won’t Stay Lit?
Most pilot outages come from three areas: the environment, contamination, or component failure. Drafts or strong airflow near the furnace can blow out a small flame — check for open windows, exhaust fans, or gaps around the cabinet. A dirty pilot orifice or assembly often makes a weak, sputtering flame that won’t hold; light cleaning or inspection can help, but stubborn deposits may need pro attention. Issues with the gas supply, like low pressure or partial blockage, lead to weak ignition or no flame and should be escalated to a technician if simple checks don’t fix the problem.
How Does a Faulty Thermocouple Affect the Pilot Light?
The thermocouple is a safety sensor that senses the pilot flame and keeps the gas valve open. When it fails, the valve shuts and the pilot goes out. Common signs of thermocouple trouble are a pilot that stays lit only while you hold the control, visible corrosion on the tip, or repeated failures after relighting. The thermocouple generates a small voltage when heated by the flame; if it’s degraded it won’t produce enough voltage and the gas will be cut off. If cleaning and proper flame positioning don’t fix it, replacement or professional testing is usually the next step.
Symptoms often point directly to the likely cause and fix. The table below helps match what you’re seeing to the next best action.
The table below matches observed symptoms with likely causes and practical next steps.
This quick guide clarifies what you can safely try at home and which situations need professional inspection or part replacement.
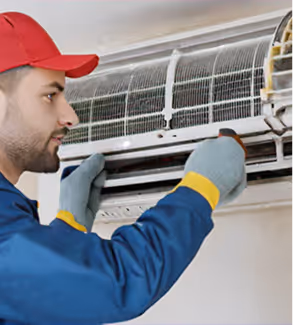
How to Relight a Furnace Pilot Light Safely and Effectively
Relighting a pilot is a common homeowner task but must be done safely and in the right order. First, do a safety check: make sure there’s no gas smell, ventilate the area, and turn off power to the furnace if the manufacturer recommends it. Follow a controlled relight sequence, watch the flame color and stability, and note any signs of deeper problems like a weak thermocouple or blocked orifice. If relighting fails after a few proper attempts, or if you smell gas or a CO alarm trips, stop and call a professional. The steps below give a clear, numbered path for safe relighting and immediate troubleshooting cues.
Follow these steps to relight a typical standing-pilot furnace safely:
- Prepare the area: Turn off the furnace, open a window or door for fresh air, and wait five minutes to clear any gas buildup.
- Locate controls: Find the pilot access and gas control knob; confirm it’s in the “off” position, then set it to “pilot” per your unit’s instructions.
- Light the pilot: While holding the pilot button in the “pilot” position, ignite the pilot with a match or built-in igniter and keep the button pressed for 30–60 seconds to heat the thermocouple.
- Confirm stability: Release the pilot button slowly — the flame should stay steady, with blue at the base, and not sputter or go out.
These steps focus on safe timing for thermocouple heating. If the pilot won’t remain lit, the following safety precautions explain when to stop and seek help.
Before relighting, observe these safety precautions and watch for red flags that require professional help.
- Check for gas odor: If you smell gas, do not relight. Evacuate, ventilate if safe, and call a professional immediately.
- Listen for unusual sounds: Hissing or rumbling near the gas valve can indicate a leak or valve issue — stop and get professional help.
- Watch CO and alarm indicators: If a carbon monoxide alarm is sounding or anyone feels dizzy, evacuate and call emergency services or a qualified technician.
These steps reduce combustion and CO risks and mark the line between safe DIY and when to call an expert.
When and How to Replace a Thermocouple: Costs and Tips
Knowing when to replace a thermocouple instead of cleaning or adjusting it prevents repeat outages and avoids unnecessary expense. Replacement is usually required when the pilot lights only while you hold the control, when the thermocouple shows visible corrosion or damage, or after repeated intermittent operation despite cleaning. Swapping a thermocouple is a straightforward task for someone comfortable with basic tools, but access, model differences, and safety concerns can make a professional replacement the safer option. The table below compares signs, DIY difficulty, and what to expect so you can decide whether to do it yourself or book a service visit.
This comparison helps you weigh observable signs against replacement difficulty and recommended actions.
How Much Does Thermocouple Replacement Cost?
There isn’t a single fixed price — cost varies with parts, labor, and how hard the assembly is to reach. Factors that affect price include your furnace model and thermocouple type, accessibility, local labor rates, and whether other components (pilot assembly or gas valve) need work. Since online estimates can vary, the most accurate price comes from an on-site quote. If you need a tailored diagnostic or estimate, request an inspection through the company’s website or Google Business Profile.
Understanding these variables helps set realistic expectations before you schedule service.
What Are the Signs That Indicate Thermocouple Replacement Is Needed?
Clear signs that a thermocouple should be replaced include a pilot that stays lit only while you hold the control, visible corrosion or physical damage to the thermocouple, repeated outages after cleaning, and age-related failure after many cycles. When these signs appear, replacing the thermocouple often restores reliable operation. If you’re unsure, a professional check can also confirm there aren’t related gas valve or supply problems.
Troubleshooting Water Heater Pilot Light Problems: Why Won’t It Light?
Water heaters use pilot systems similar to furnaces, but differences in burner layout, sediment buildup, and venting mean troubleshooting needs to be adjusted. Common water heater pilot failures include a clogged pilot orifice, a worn thermocouple, sediment or corrosion in the burner area, and issues with gas supply or venting. Safe relighting for water heaters follows the unit’s labeled steps and the same safety checks for gas smell and CO risk. The sections below explain causes that are unique to water heaters and give a step-by-step relight routine for typical tank-style models.
What Causes a Water Heater Pilot Light Not to Light?
Water heater pilot failures often come from sediment in the tank or burner chamber, burner condition, or thermocouple problems. Sediment can affect combustion and create a sooty or yellow flame, which is a sign of burner contamination. A blocked pilot orifice or a failing thermocouple also prevents ignition or a steady flame, and restricted venting can starve combustion air and extinguish the pilot. Identifying whether the issue is airflow, supply, or component-related determines if cleaning, vent repair, or professional service is needed.
How to Fix and Relight a Water Heater Pilot Light?
Relighting a water heater pilot follows a safety-first sequence similar to a furnace but uses the unit’s specific controls and access panels. Start with a gas-smell check and good ventilation, set the control to “OFF” and wait several minutes, then follow the relight label: switch to “pilot,” press the pilot button while igniting, hold to heat the thermocouple, and confirm a steady flame before returning the control to “on.” If the flame is weak or won’t stay lit, you can inspect and gently clean the pilot orifice and burner if you’re comfortable doing so; persistent problems from sediment or corrosion should be handled by a technician. Proper venting and a clean burner are central to long-term reliability.
How to Maintain Your Pilot Light to Prevent Future Problems
Routine maintenance reduces pilot light failures and extends component life by keeping the pilot assembly, thermocouple, and burners clean and correctly positioned. Simple homeowner tasks — visual flame checks, clearing dust, and keeping vents and intake areas unobstructed — catch small issues before they become outages. Professional maintenance complements these checks with deeper cleaning, burner adjustment, gas pressure checks, and safety testing. The maintenance checklist below gives a practical schedule and notes to keep pilot systems reliable.
This maintenance table lists practical checks, recommended frequencies, and tools or notes for safe upkeep.
What Regular Checks Can Keep Your Pilot Light Functioning?
Regular checks are quick, low-risk tasks that prevent many pilot problems by catching early warning signs. Monthly visual checks confirm the flame is blue and steady. Look around the unit for dust, debris, or drafts that could affect the flame. Make sure combustion air and vents are clear and access panels are secure — small adjustments or cleaning often restore reliable ignition. If you find soot, yellow flame, or frequent outages, schedule professional maintenance for combustion tuning and component replacement.
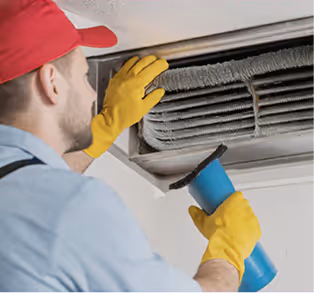
How Does Cleaning Affect Pilot Light Performance?
Cleaning the pilot orifice, assembly, and burner areas improves flame stability and combustion by removing soot, dust, and insect debris that restrict fuel flow. Proper cleaning restores the correct flame shape and heat transfer to the thermocouple so it can generate the voltage needed to hold the gas valve open. Homeowners can do basic cleaning with gas and power off, but stubborn deposits, fragile parts, or tight access should be handled by a technician to avoid damage. If cleaning fixes the issue, keep up with periodic checks; if not, replacement or pro repair is likely required.
For preventive care, consider regular professional inspections — a qualified technician can spot wear and gas-system issues early. Schedule maintenance through the company’s website or Google Business Profile for reliable preventive service.
When to Call a Professional for Pilot Light Troubleshooting and Repair
Knowing when to stop DIY troubleshooting and call a professional keeps you safe and ensures complex faults are fixed correctly. Call a technician if you smell gas, a carbon monoxide alarm activates, relighting keeps failing, or signs point to the gas valve, supply pressure, or persistent thermocouple and pilot assembly problems. Professionals provide on-site diagnostics, safe gas handling, and component replacement when needed — saving time and reducing risk. The sections below list warning signs, how to pick a reliable technician, and the key questions to ask when scheduling service.
What Are the Warning Signs That Require Expert Help?
These symptoms need prompt professional attention rather than more DIY attempts: any persistent gas odor, a triggered carbon monoxide alarm, visible gas leaks, repeated pilot outages despite correct relighting, or obvious damage to gas components. Other red flags include unusual furnace noises, yellow or sooty flames after cleaning, and uneven heating that suggests valve or pressure problems. If you see any of these, shut off the appliance if safe to do so, ventilate the area, and schedule an inspection to diagnose fuel delivery, valves, and safety sensors.
How to Choose a Reliable Technician for Pilot Light Issues?
Pick a technician who puts safety first, explains their diagnostic steps, and performs on-site testing of gas pressure, valves, and combustion quality. Ask how they diagnose problems, whether they document findings, and if they provide a written estimate. Confirm their availability and expected response time. When you’re ready to schedule, use the company’s website or Google Business Profile to request an inspection and ask for recommendations based on the symptoms you’ve observed. A technician who explains the cause and next steps helps ensure repairs focus on the root problem, not quick fixes.
A professional visit is often the safest and most efficient choice for complex or recurring pilot light problems. Contacting service through a reputable online listing can speed scheduling and ensure you get a documented inspection and estimate.
- When to call: Persistent outages, gas odor, carbon monoxide alarm, or visible leaks.
- What to ask: Do you perform on-site diagnostics, combustion testing, and provide a written estimate?
- How to schedule: Request an inspection through the provider’s website or Google Business Profile for a tailored quote and response time.
These steps take you from spotting an urgent issue to getting professional help that prioritizes safety and long-term reliability.
Conclusion
Knowing how your pilot light works and doing a few regular checks goes a long way toward reliable heating and safety. This guide helps you diagnose common issues, relight safely, and decide when to call a pro. If problems persist or you’re unsure, reach out to us for help. Browse our resources for more tips or contact our team for personalized support.
Customer Testimonials

In the past 18 months, Adams has installed a new Amana air conditioning system, and new filtration and humidification systems at my home. The installers were all very courteous, professional and knowledgeable. Their work was simply superb... reasonably priced, and performed on time and to perfection! I enthusiastically recommend Adams, without reservation!
As usual, Adams Heating and Cooling exceeded our expectations. The quote was done in a timely manner, pricing was fair, installation was quick and the job was done right! Rob is great to work with. Adams is first on our list!
Called these guys off of a referral from a friend. Home furnace failure in sub-zero temperatures, late at night. Dan was there in an hour. Friendly, polite, professional and most importantly, very competent. Diagnosed and fixed the problem in under an hour. After hours 24/7 pricing was surprisingly reasonable. This outfit gets straight A+ from us.
Excellent service! We had them replace our heater, AC, and water heater as a package deal. They even helped with financing as it was a large expense to address at one time. It left us with peace of mind that all the mechanicals in our home were new!
They have always been there for us and did so again by responding quickly to put in a new furnace after a lighting strike caused a power surge. In addition, their electrician came by to help with other issues caused by the strike. Everyone we work with from the who answers the phone to who shows up to complete the work are polite, pleasant and professional! And quick to respond and on time!
From the service call to the installation with Dan, Dave, and Daniel… our experience was top notch. They quickly came out, identified the problem, and installation of our new unit took less than 3 hours. Can’t recommend Adams enough!
Dan, Dave and Mike were phenomenal! Very patient, listened to my questions/concerns, and made sure that everything was working and that my Nest was working correctly, before leaving. Thank you so much for your service!
Service was excellent! Had a new furnace installed. The technicians did a wonderful job and completed the installation quickly. Mike answered my questions and followed up to verify the worke done. I was charged just as I was quoted. Have used Adam's for repairs in the past and I'm always pleased. Great work!
I had a boiler and water heater replacement/upgrade. I went from an 84% efficient boiler to a 95% efficient. I dont recall the water heater's efficiency. That was upgraded to an indirect water heater. Josh and Brad did a great job. The work looks great. The boiler and water heater work as to be expected. Their customer service is excellent. I will definitely be calling then when my basement remodel is ready to start.
I have had Adam's Heating and Cooling out at my house before, so I called them for some gas line work. The estimator was very helpful and let me know the best way to be ready for when the work is scheduled so they can test the generator after they install the gas line to the meter and also let me know how to take care of another issue I had that would be helpful. I look forward to getting this work done and working with them.

Financing
Flexible financing options are available to help you get the comfort you need without the upfront financial stress.