
Provides a complete overview of ductless mini-split installation in Oshtemo, MI, highlighting benefits like precise zoning, energy savings, and suitability for homes without ducts. Explains common types (single-zone vs multi-zone and indoor head styles), signs you need a pro, and a step-by-step installation process from initial survey and load calculation to electrical, refrigerant routing, commissioning, and post-installation guidance. Covers common installation issues, warranty and maintenance options, expected timelines, and tips for selecting an experienced installer for reliable performance in Oshtemo climate.
.avif)
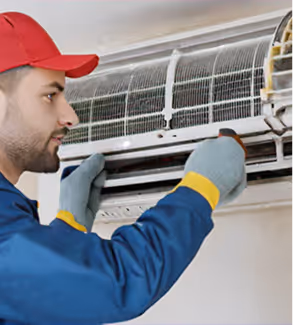
Mini Split AC Installation in Oshtemo, MI
A ductless mini split AC installation in Oshtemo, MI gives homeowners precise temperature control, lower energy bills, and a practical cooling and heating solution for homes without ductwork. In the Kalamazoo area climate, where humid summers and cold winters create a wide comfort range, a properly installed mini split provides efficient cooling in summer and reliable heat-pump heating in shoulder seasons. This page explains the full installation process, common decisions and problems, what to expect during commissioning, and the long-term benefits for Oshtemo homes.
Why Oshtemo homes choose ductless mini-splits
- Many Oshtemo houses are older or have limited attic and crawlspace for ductwork; mini splits avoid invasive remodeling.
- Zoned comfort addresses rooms with different occupancy or solar loads, common with large windows or sun-facing additions.
- High efficiency heat-pump operation helps reduce electric HVAC costs during Michigan summers and provides supplemental heating in milder winter periods.
- Quiet indoor units and minimal exterior footprint are practical for suburban neighborhoods.
Common mini split types and when to pick each
- Single-zone systems: ideal for a single large room, finished basement, or workshop where targeted cooling and heating are needed.
- Multi-zone systems: connect two to eight indoor heads to one outdoor condenser to condition several rooms while keeping separate temperature control.
- Indoor head styles: high-wall (most common), floor/low-wall consoles (good for retrofits), ceiling cassettes (best for even distribution in open plans), and ducted indoor units (for hidden installation where slight ducting is acceptable).
Typical signs you need a professional installation
- No existing ductwork or impractical duct retrofits.
- Rooms that remain too hot or cold despite central HVAC.
- Desire to add conditioned space like a sunroom, garage conversion, or addition without reworking the whole system.
- Goal to reduce energy usage and control zones independently.
The installation process — step by step
- Initial consultation and site survey
- A technician inspects the home layout, window orientation, insulation levels, ceiling heights, and electrical panel capacity.
- The team determines where indoor units will be most effective for airflow, aesthetics, and refrigerant routing.
- Local considerations such as driveway access, exterior wall condition, and condo/HOA restrictions are noted.
- Load calculation and unit sizing
- A Manual J style load calculation assesses cooling and heating requirements per room, accounting for Michigan-specific factors like humidity and solar gain.
- Proper sizing is crucial: oversized systems short-cycle and provide poor dehumidification; undersized units struggle during heat waves.
- The result dictates the outdoor unit capacity and the number and size of indoor heads.
- Choosing indoor and outdoor equipment
- Selection balances efficiency (SEER/HSPF ratings), sound levels, warranty coverage, and preferred head style.
- Single-zone equipment is simpler; multi-zone requires careful matching of indoor capacities to the outdoor condenser’s capability.
- Electrical and mounting preferences affect model choice — some outdoor units are better for tight patio spaces or elevated mounts.
- Electrical and mounting requirements
- Most installations need a dedicated circuit and a disconnect at the outdoor unit; panel capacity is reviewed during the site survey.
- Indoor units mount to a small bracket on the wall or ceiling; the installer locates studs and uses appropriate anchors to guarantee stability.
- Clearances for service access and local code compliance are followed.
- Refrigerant line installation and mounting
- Refrigerant lines and a condensate drain run through a small 2 to 4 inch hole between indoor and outdoor units; line lengths are minimized to preserve efficiency.
- Lines are insulated and secured; outdoor mounting may require a pad, wall bracket, or roof stand depending on site conditions.
- Proper slope on the condensate line and anti-siphon measures prevent water leaks.
- Evacuation, leak testing, and commissioning
- Technicians vacuum the refrigerant lines to remove moisture and air, then pressure-test to check for leaks.
- The system is charged according to manufacturer specifications and run through performance checks: airflow, temperature split, compressor operation, and defrost cycles for heating.
- Remote controls and app integrations are configured and demonstrated.
- Post-installation walkthrough and documentation
- The installer explains normal sounds, filter access, basic troubleshooting, and seasonal operation differences for heating vs cooling.
- Warranty paperwork, maintenance recommendations, and service intervals are reviewed.
- Technicians confirm homeowner satisfaction with placement, noise levels, and unit performance.
Common installation issues to avoid
- Incorrect sizing leading to humidity problems or short cycling.
- Poor indoor unit placement causing cold or hot spots.
- Insufficient electrical capacity or improper wiring that limits performance.
- Improper condensate routing leading to leaks or mold buildup.
- Incomplete evacuation and charging resulting in reduced efficiency and premature wear.
Warranty and maintenance options
- Most manufacturers provide parts and compressor warranties; labor warranty terms vary by installer.
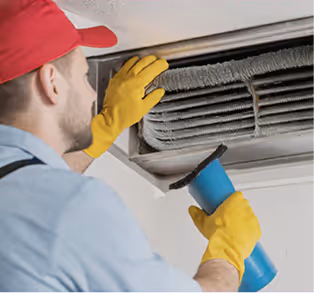
- Routine maintenance every 6 to 12 months preserves efficiency: cleaning filters, inspecting electrical components, checking refrigerant charge, and clearing condensate lines.
- Seasonal checks before summer and winter help avoid comfort disruptions during peak demand in Oshtemo.
Typical timelines and what to expect on install day
- Single-zone installs often complete in one day: site prep, mounting, line installation, and commissioning.
- Multi-zone systems typically require one to two days depending on the number of heads, routing complexity, and any electrical upgrades needed.
- Weather, permit processing, and access issues can affect schedules; installers usually perform a site survey beforehand to plan properly.
Energy efficiency and cost-savings benefits
- Modern ductless mini splits typically deliver higher seasonal efficiency than many older central systems, especially when ducts are leaky or nonexistent.
- Zoning capability reduces wasted conditioning by allowing only occupied areas to be cooled or heated.
- In Oshtemo’s climate, efficient heat-pump operation provides lower-cost cooling in summer and can reduce reliance on central heating for moderate winter days, improving overall energy use.
Final considerations for Oshtemo homeowners
Selecting an experienced installer who performs accurate load calculations, follows best practices for refrigerant handling, and documents warranties and maintenance plans is essential. Properly designed and installed, a ductless mini split system will deliver consistent comfort, better humidity control in humid Michigan summers, and efficient supplemental heating during milder winter periods. Regular maintenance and correct operation extend system life and maintain energy savings for years.
Customer Testimonials

In the past 18 months, Adams has installed a new Amana air conditioning system, and new filtration and humidification systems at my home. The installers were all very courteous, professional and knowledgeable. Their work was simply superb... reasonably priced, and performed on time and to perfection! I enthusiastically recommend Adams, without reservation!
As usual, Adams Heating and Cooling exceeded our expectations. The quote was done in a timely manner, pricing was fair, installation was quick and the job was done right! Rob is great to work with. Adams is first on our list!
Called these guys off of a referral from a friend. Home furnace failure in sub-zero temperatures, late at night. Dan was there in an hour. Friendly, polite, professional and most importantly, very competent. Diagnosed and fixed the problem in under an hour. After hours 24/7 pricing was surprisingly reasonable. This outfit gets straight A+ from us.
Excellent service! We had them replace our heater, AC, and water heater as a package deal. They even helped with financing as it was a large expense to address at one time. It left us with peace of mind that all the mechanicals in our home were new!
They have always been there for us and did so again by responding quickly to put in a new furnace after a lighting strike caused a power surge. In addition, their electrician came by to help with other issues caused by the strike. Everyone we work with from the who answers the phone to who shows up to complete the work are polite, pleasant and professional! And quick to respond and on time!
From the service call to the installation with Dan, Dave, and Daniel… our experience was top notch. They quickly came out, identified the problem, and installation of our new unit took less than 3 hours. Can’t recommend Adams enough!
Dan, Dave and Mike were phenomenal! Very patient, listened to my questions/concerns, and made sure that everything was working and that my Nest was working correctly, before leaving. Thank you so much for your service!
Service was excellent! Had a new furnace installed. The technicians did a wonderful job and completed the installation quickly. Mike answered my questions and followed up to verify the worke done. I was charged just as I was quoted. Have used Adam's for repairs in the past and I'm always pleased. Great work!
I had a boiler and water heater replacement/upgrade. I went from an 84% efficient boiler to a 95% efficient. I dont recall the water heater's efficiency. That was upgraded to an indirect water heater. Josh and Brad did a great job. The work looks great. The boiler and water heater work as to be expected. Their customer service is excellent. I will definitely be calling then when my basement remodel is ready to start.
I have had Adam's Heating and Cooling out at my house before, so I called them for some gas line work. The estimator was very helpful and let me know the best way to be ready for when the work is scheduled so they can test the generator after they install the gas line to the meter and also let me know how to take care of another issue I had that would be helpful. I look forward to getting this work done and working with them.

Financing
Flexible financing options are available to help you get the comfort you need without the upfront financial stress.