Mini split installation in Oshtemo, MI, covering benefits of ductless systems, zoning options, and cold-climate performance. It outlines a typical installation process—from site assessment and load calculations to equipment mounting, electrical work, permits, startup, and balancing. It highlights energy-efficiency metrics, refrigerant handling, and code compliance, and explains choices between single-zone and multi-zone configurations. The guide also outlines the expected timeline, homeowner prep steps, common issues and prevention strategies, plus maintenance recommendations and long-term cost savings for reliable, efficient year-round comfort.
.avif)
Mini Split Installation in Oshtemo, MI
Mini split installation in Oshtemo, MI offers a highly efficient, flexible way to heat and cool individual rooms or whole-home zones without extending or modifying ductwork. With Kalamazoo County’s cold Michigan winters and humid summers, choosing the right ductless mini split and a professional installation process is critical to reliable comfort and long-term energy savings. Below is a detailed, decision-stage guide that explains the full installation process, local considerations, common issues, and what to expect before, during, and after installation.
Why choose a mini split in Oshtemo, MI
- Zoned comfort for older homes or additions where ducts are impractical.
- Heat pump technology provides efficient heating during shoulder seasons and milder winter days.
- Cold-climate models maintain capacity at lower temperatures, important for Michigan winters.
- Improved indoor air quality by using washable filters and avoiding duct-borne dust and allergens.
Common mini split types and recommended brands
- Single-zone vs multi-zone: single indoor unit for one space; multi-zone systems serve multiple rooms with one outdoor compressor.
- Ductless wall-mounted, ceiling cassette, floor-mounted and concealed duct options to fit design and airflow needs.
- Recommended brands for cold-climate performance and reliability: Mitsubishi Electric, Daikin, Fujitsu, LG, Panasonic, Bosch. Look for models with cold-climate ratings or “Hyper-Heat” capability for better low-temperature performance.
- Energy-efficiency metrics to compare: SEER2, HSPF2, EER, and ENERGY STAR certification.
Typical installation process
- Site assessment and load calculations
- A technician inspects the home layout, insulation levels, window orientation, and existing heating systems.
- Precise load calculations (Manual J or equivalent) determine required capacity for each zone. This prevents oversizing or undersizing that reduces efficiency and comfort.
- For multi-zone systems the installer evaluates line-set routing and outdoor unit placement for optimal performance and minimal obstruction.
- System and line-set placement
- Indoor unit locations are chosen for even airflow, access for maintenance, and aesthetic considerations.
- Outdoor compressor placement considers airflow, noise, snow accumulation, and local setback requirements. In Oshtemo, elevated pads or slight clearance can help with heavy snow and salt exposure.
- Refrigerant line lengths and elevation differences are checked against manufacturer limits.
- Mounting indoor and outdoor units
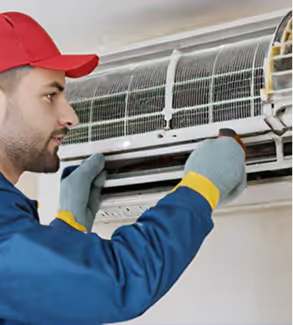
- Indoor units are mounted on brackets or recessed into ceilings based on the chosen style. Clearances for filters and service access are maintained.
- Outdoor units are mounted on a concrete pad, vibration isolators, or a wall bracket, ensuring stability during freeze/thaw cycles.
- Electrical and refrigerant work
- Dedicated circuit installation and disconnects follow local electrical codes. Breaker size and wire gauge are sized to match the system.
- Refrigerant work is handled by licensed technicians (EPA 608-certified in the U.S.). Installation includes brazing or flare fittings, evacuation to proper vacuum levels (typically ~500 microns), leak testing (nitrogen pressure tests), and charging per manufacturer specifications. Modern systems often use factory-charged outdoor units with additions based on line-set length.
- Permits and code considerations
- Most municipalities require electrical and mechanical permits for HVAC installations. Local code considerations include electrical disconnect placement, setback from property lines, and noise ordinances.
- In Oshtemo Township and Kalamazoo County, installers follow Michigan’s mechanical and electrical codes and pull permits where required. A licensed installer will handle permit submittal and inspections.
- System startup and balancing
- After charging and electrical hookup, the system is started and tested in heating and cooling modes.
- The technician checks airflow, verifies temperatures, measures amperage and voltage, and confirms correct refrigerant pressures.
- Controls and zoning settings are programmed, and a homeowner walk-through explains thermostat/remote operation.
Timeline and homeowner preparation
- Typical timeline: site assessment and quote (1 visit), scheduling and permitting (3–14 days depending on permit processing), installation day(s) (4–8 hours for a single-zone; 1–3 days for multi-zone systems including electrical and final testing). Complex jobs or permit delays can extend timelines.
- How to prepare:
- Clear paths to installation locations and outdoor unit area; protect flooring and furniture.
- Ensure access to the main electrical panel.
- If replacing an old system, have fuel sources or backup heating ready during the swap.
- Expect a moderate noise level and brief service access near the outdoors during installation.
Warranty, testing, and post-installation checklist
- Warranties: Most manufacturers offer compressor and parts warranties; labor warranties vary by installer. Confirm warranty terms, registration requirements, and recommended maintenance intervals.
- Post-installation testing includes:
- Leak checks and a vacuum hold test to ensure no moisture or contaminants remain.
- Refrigerant charge verification and superheat/subcooling measurements.
- Electrical safety checks, breaker coordination, and verification of disconnect functionality.
- Performance testing to confirm heating capacity at cold outdoor temperatures and balanced airflow.
- Documentation: homeowners should receive equipment manuals, warranty paperwork, refrigerant charge documentation, and a final inspection report if permits were pulled.
Common issues in Oshtemo and how installation prevents them
- Reduced heating performance in severe cold: use cold-climate rated mini splits and proper sizing to maintain capacity at lower temps.
- Line-set leaks or improper brazing: handled by certified technicians who perform nitrogen pressure testing and vacuuming.
- Electrical overloads or incorrect breaker sizing: avoided by installing dedicated circuits sized to manufacturer specs.
- Snow and ice problems at the outdoor unit: elevated pads and clearances prevent snow drift and ease maintenance.
Maintenance and long-term benefits
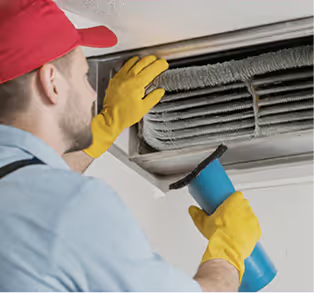
- Recommended maintenance: clean filters every 1–3 months, annual professional inspection for refrigerant levels and electrical connections, and coil cleaning as needed.
- Long-term benefits: lower operating costs versus electric resistance or baseboard heat, targeted zone comfort, reduced energy waste, and potential eligibility for local utility rebates or incentives for high-efficiency equipment.
Mini split installation in Oshtemo, MI should be planned with local climate performance, proper load calculations, and code-compliant electrical and refrigerant work in mind. A complete installation includes careful site assessment, professional mounting and charging, permit handling, thorough testing, and clear documentation so your system delivers reliable comfort through Michigan winters and humid summers.
Customer Testimonials

Financing
Flexible financing options are available to help you get the comfort you need without the upfront financial stress.


